Showing posts with label sewing. Show all posts

Tuesday, June 14, 2011

A Table Slipcover, If You Will

Ok. So the new objects of my affection (Craigslist chairs) landed in my dining room. I love my little farmhouse table. It's cute. Not a "forever" piece since it won't sit the 8-10 I would prefer but I like it. We bought the dining set along with these side tables when we moved into our current (and first "grown up") house, coming from a tiny 1 bedroom apartment. I envision this as a breakfast table in it's next life if we move to another house.
I digress, I dragged my gray/french blue-ish chairs into the dining room where they sat with 4 other white chairs and a table with a dark wood top and white legs.

Photobucket

Too many finishes in one place. My eyes were bouncing all over the room. I don't know what color to look at. Please. tame. this. space.

I threw on a white table cloth that I use for special occasions.

Photobucket

Close, but still not quite what I wanted for every day use. Think.....think...
I remembered a cute table cloth my friend, Emily, made for her daughter's birthday party table...darling....I was inspired to create.....

...I shall make my own custom fitted tablecloth! In the shabby variety...

.....with RUFFLES!

Photobucket

LOVE IT!( Please disregard the trashed out play room beyond!)

Now the chairs can shine against a neutral backdrop and my dining room gets a light and fresh makeover for the summer months.....now maybe I need to paint the room too?? The sage green is getting a little tired these days....
Photobucket

Aaaaand....the photo session is over as I was informed it was POOL TIME!

Photobucket


A Little Knick Knack


Transformation Thursday


UndertheTableandDreaming

Tuesday, May 24, 2011

Tee Time

I love making personalized gifts for people. I am in a busy season of life with 2 toddlers so I don't get to do this as much as I like but my new favorite thing is making applique t-shirts.

I thought I'd do a quick tutorial even though this may be so obvious. I apologize if you start to drift off!!
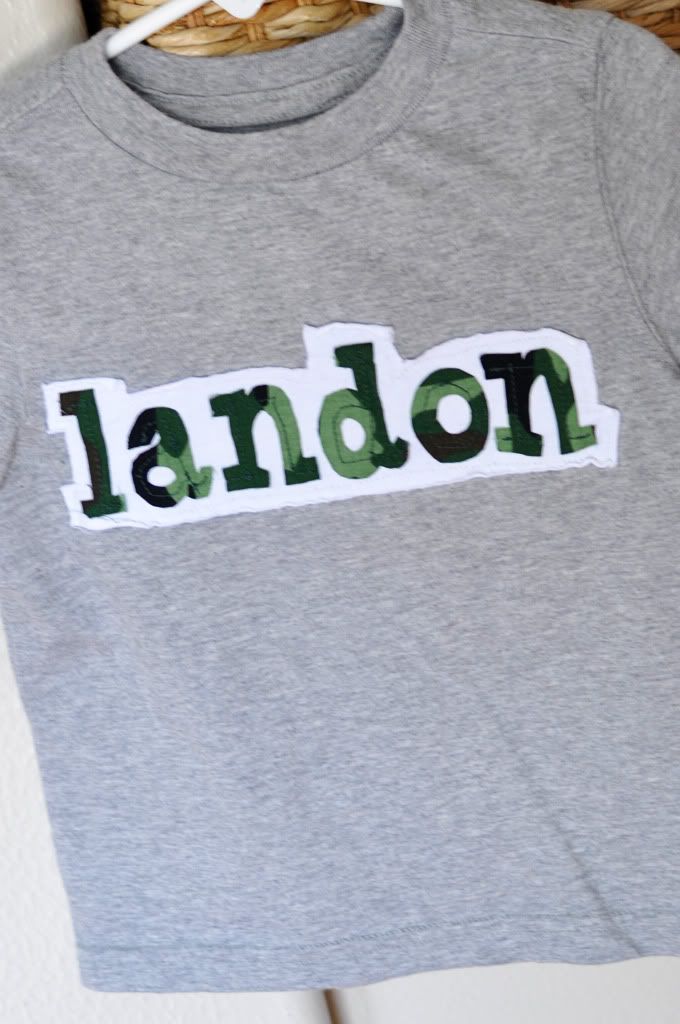
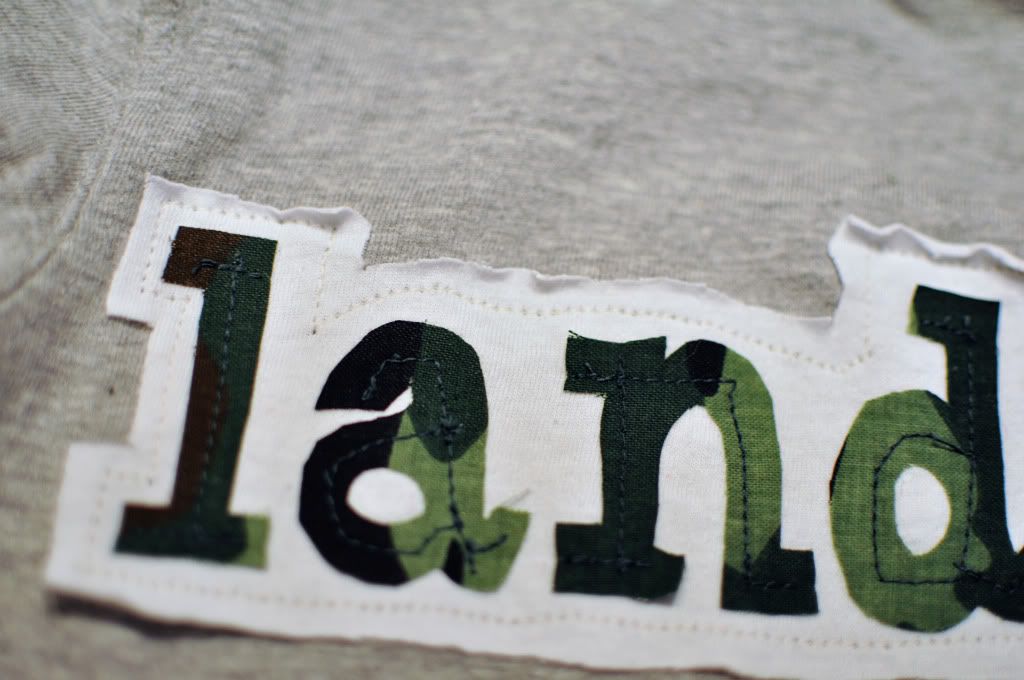
I made this one for our friend's little boy....wow...sorry for the blurry picture!

Photobucket

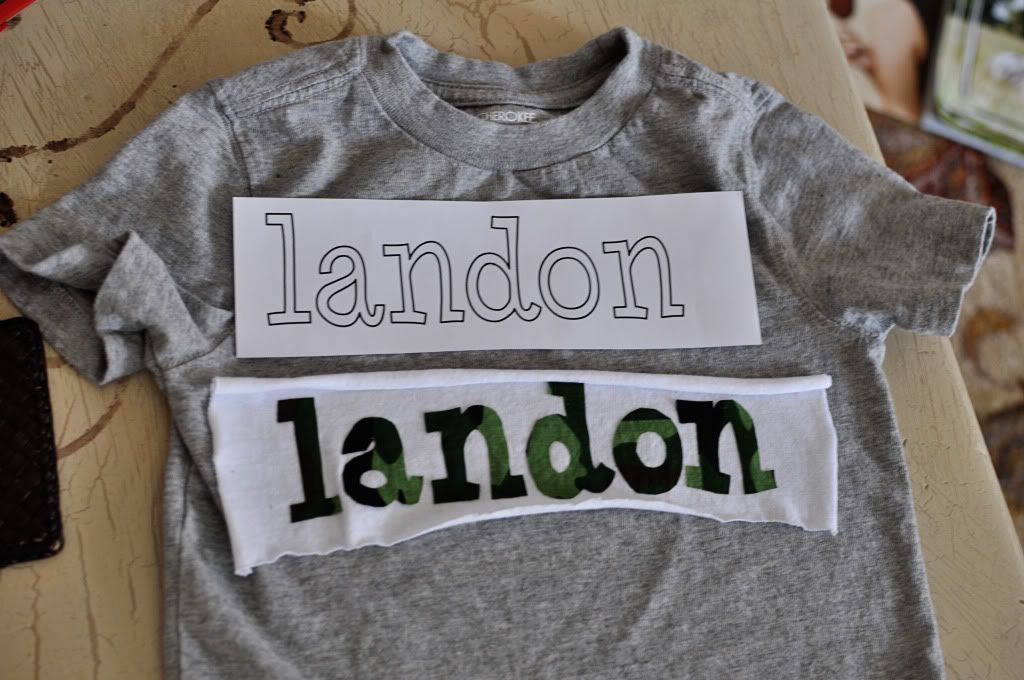
1. Print the letters out in Microsoft Word in a font you like, making sure it is the correct size to fit the t-shirt. I cut out each letter from the paper, pinned the paper letter on the camo fabric, and re-cut each letter from the fabric. I usually cut the fabric slightly larger than my paper letter by about 1/4". I do this only because it is easier (for me) to not cut exactly on the line of the paper letter and make so many intricate corner cuts.

2. Cut a large rectangle of white jersey t-shirt material as a "background" for the camo letters.

Photobucket

3. I used fusible tape or stitch witchery to adhere the camo letters to the white jersey fabric to make it easier to sew them on later. Just place a damp washcloth over the camo letters (stitch witchery between camo and white jersey) and apply a hot iron to get it to stick.

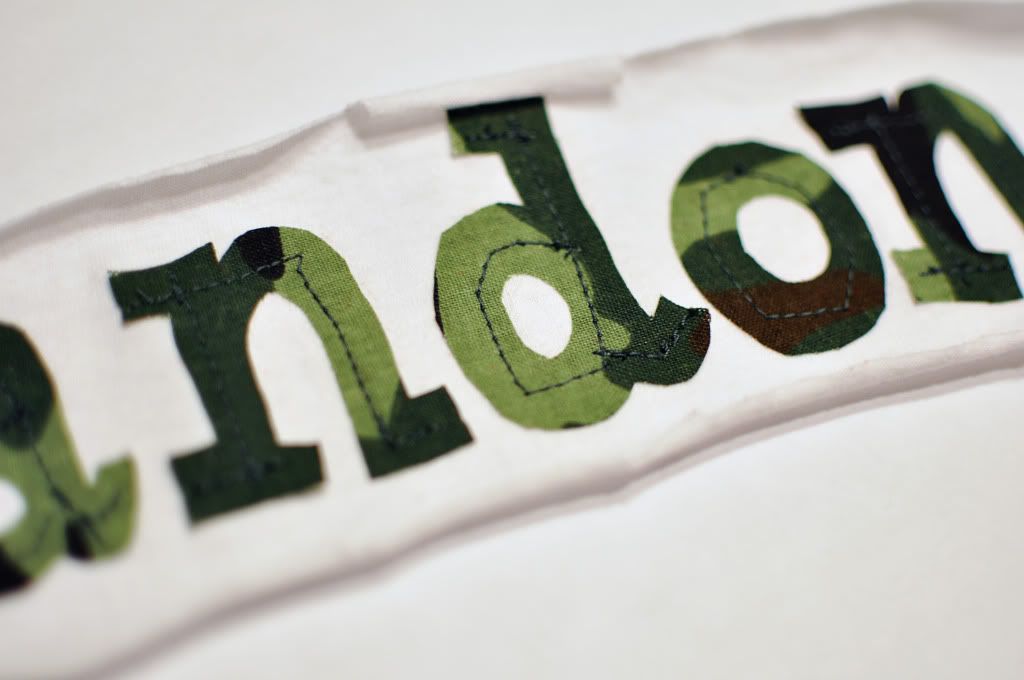
4. Now, the patience builder. I carefully and slowly stitched the letters for extra reinforcement. This takes a little practice and patience but you just stop every few stitches and turn your fabric so you can sew a line down the middle of each letter. See, if you look close, it's not perfect but it does the job. Camo letters aren't moving now.

Photobucket

Photobucket


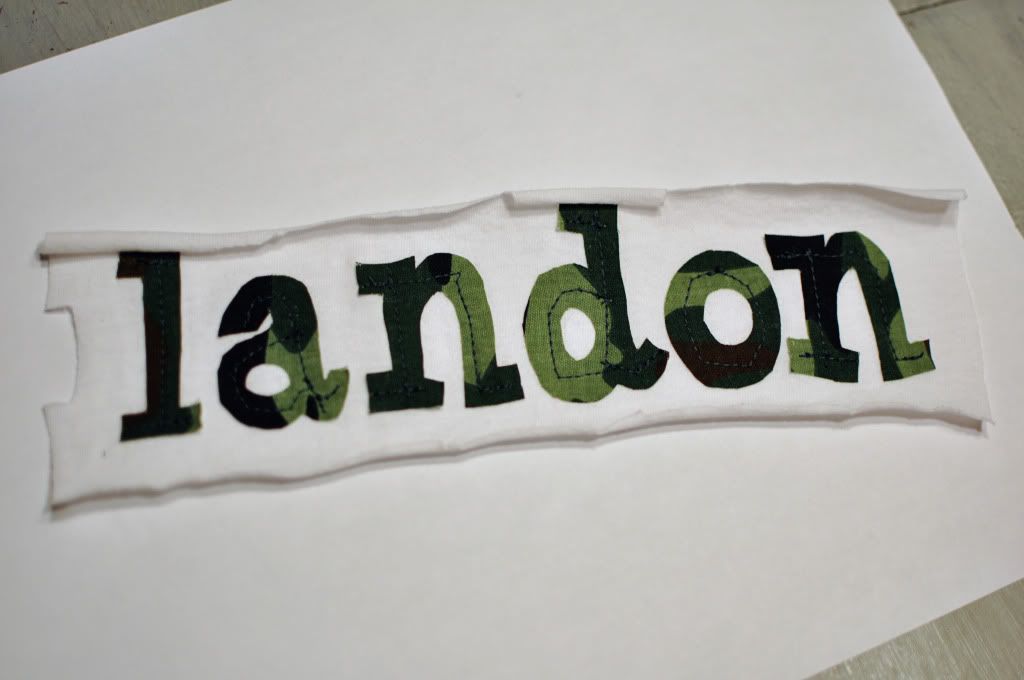
5. Attach the camo letters/white jersey piece to your t-shirt with the stitch witchery method again. (The great thing about doing it layered like this is if you get this far only to mess up, you haven't ruined the t-shirt, you just start over with the name again!---or you give up---but don't do that---remember I said it takes a little patience---you can do this!)

6. Ok, almost done. Now you do a reinforcing stitch to attach the white jersey background onto the t-shirt. Sew as close as you can around the name on the white jersey.

7. Trim off the excess around the outline stitch very carefully (preferably with small scissors) so you don't clip the main t-shirt, as I have done before....unfortunately

Photobucket

And here you go!
Photobucket

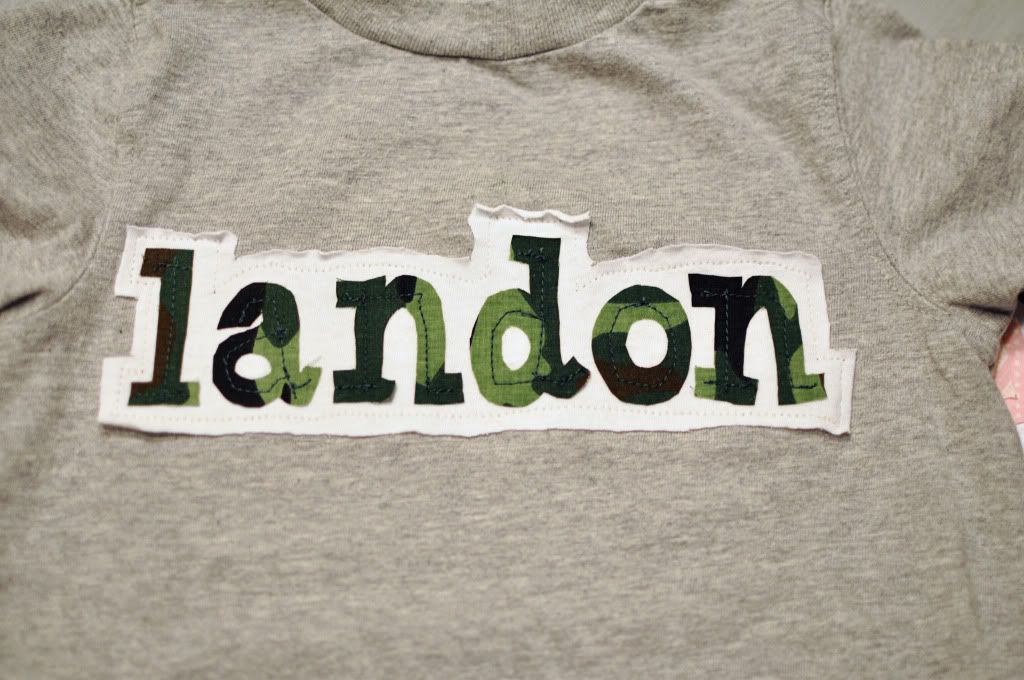
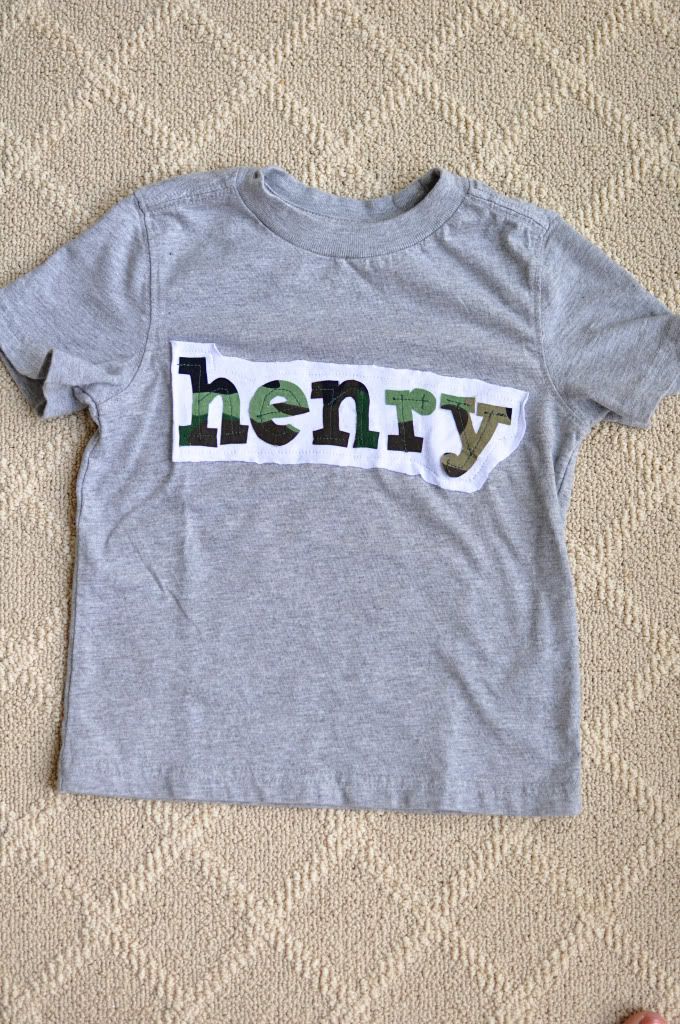
When you wash it, the edges of the letters will probably fray a bit but I think it adds charm and ruggedness to the look. It is a little boy's camo shirt, after all. We're going for a rugged look here. Here is another one...
Photobucket

Photobucket

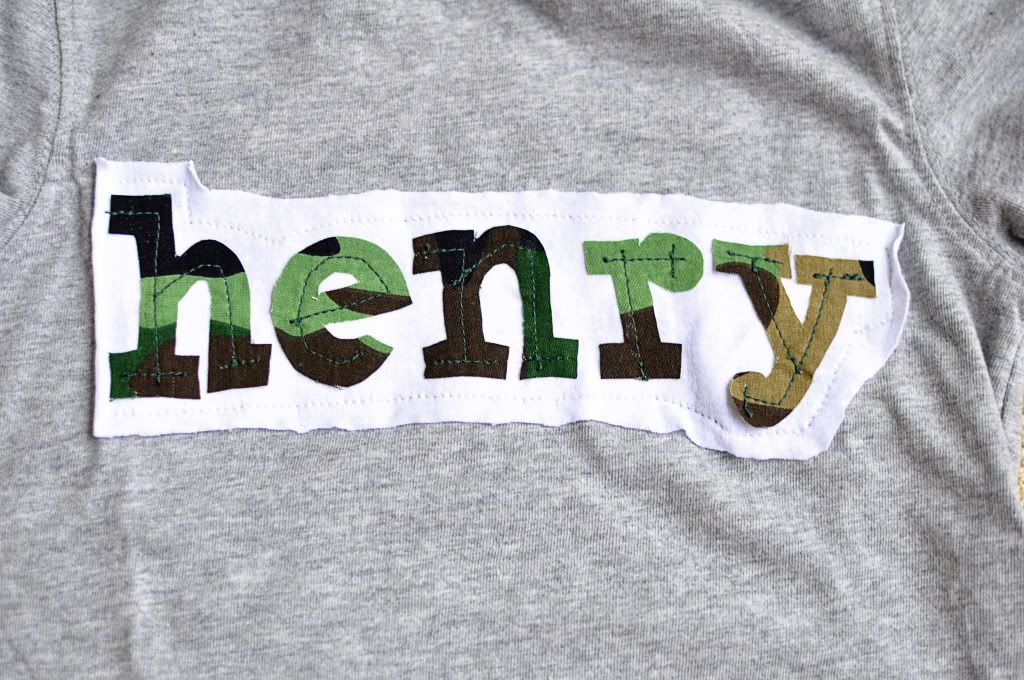
The possibilities are endless with this basic concept.

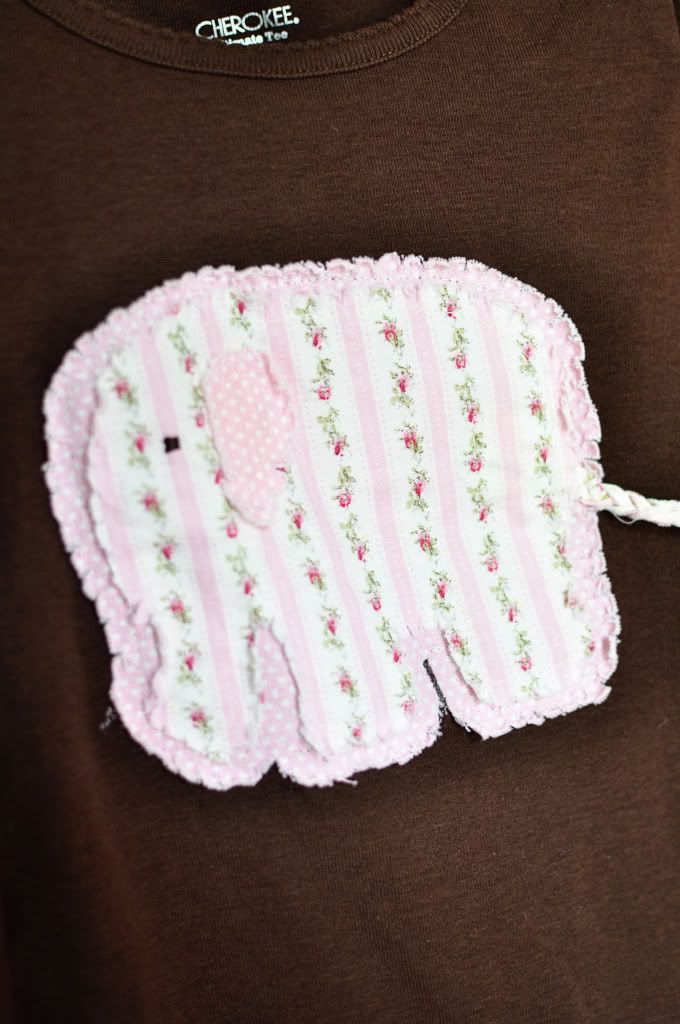
I made this one for Landon's sister....

Photobucket

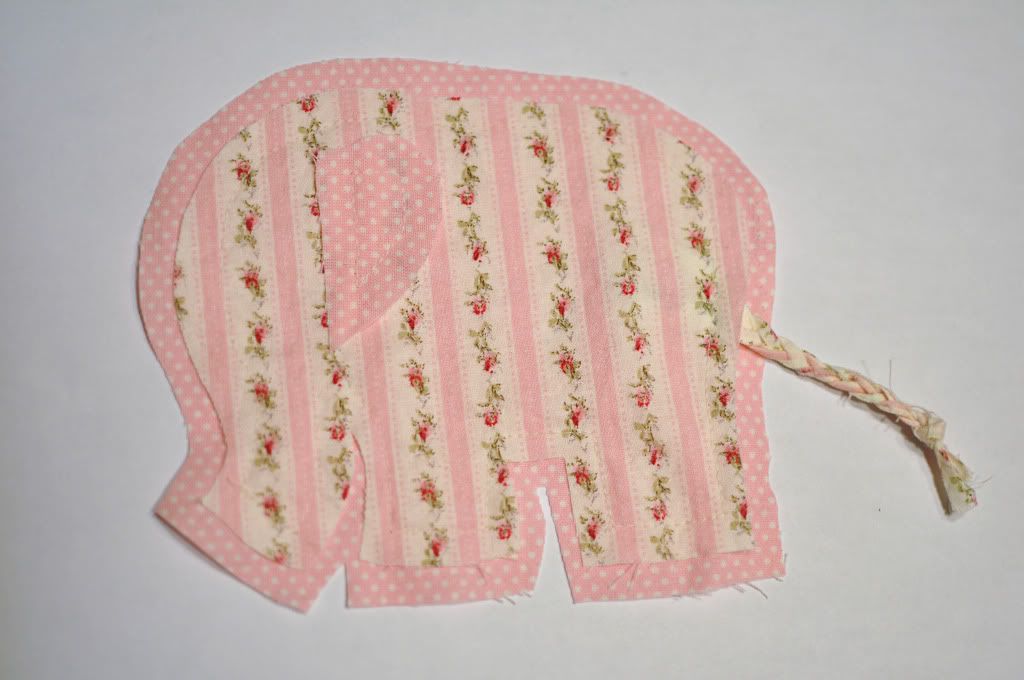
It's the same concept but I wanted the edges of this elephant to really fray so I cut the elephant about 1/2" larger than the template, then snipped flaps every 1/4" without cutting through your outline stitch. This snipping method is good when you're using cotton or poplin material. It helps the edge to fray

Photobucket

Then when you wash it several times it will fray up (kind of like a rag quilt, if you've ever made one of those it's similar)

Photobucket

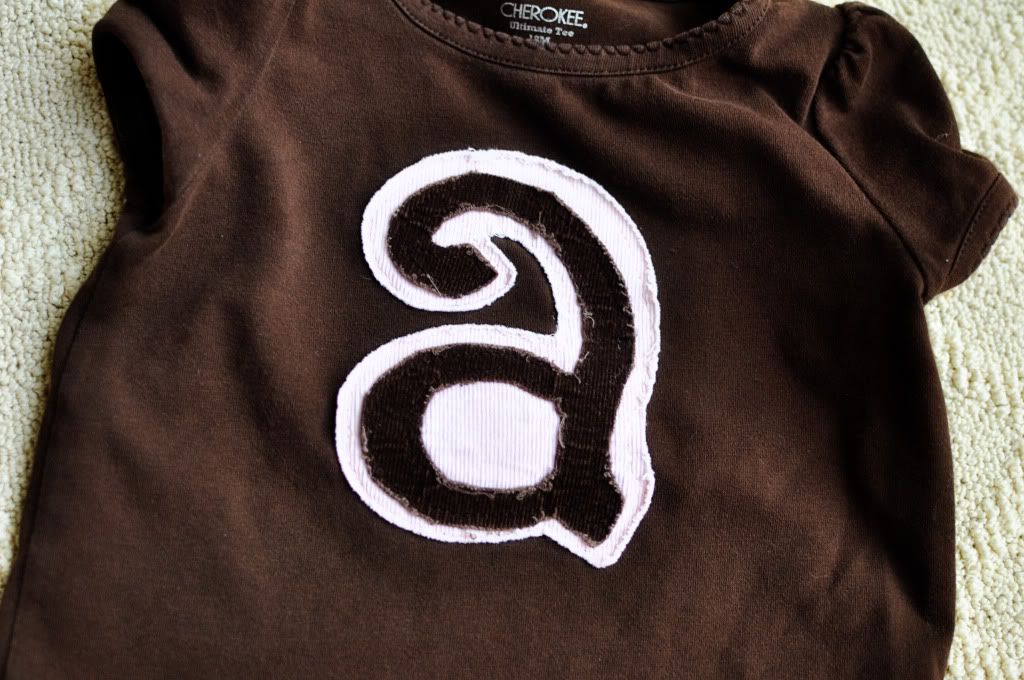
I used the same concept to make this shirt for my daughter. This one has been washed several times so it is really nice and frayed.

Photobucket

I used corduroy for this one and it frays nicely without snipping around the edges. Just a straight stitch to sew the little A to the large A first. Then another straight stitch to sew the large A to the shirt.

Photobucket

Partying at


PS - These lovely ladies featured my frenchy benchy at their linky party recaps! Thanks so much


UndertheTableandDreaming


Saturday, May 14, 2011

Frenchy Benchy

I bought this sad bench a while ago. The lady I bought it from wasn't planning to sell it until she had painted and reupholstered it. As she talked, all I heard was "red....velvet.....floral" and I knew I had to save this poor bench from certain embarassment.

Photobucket
Photobucket

It looks worse than it really is. The springs and seat part were in good shape. I knew it just needed a paint job and some foam/batting/upholstery on top. That's something easily remedied with my handy dandy staple gun.

First I gave it a coat of Valspar's Sea Salt Blue...love this color. Then I dry brushed my Annie Sloan's Old White Chalk Paint over the blue. A coat of Clear Hannant's Wax. Then a little strategic sanding (which ended up letting the weird green peek through but I rolled with it). Then a bit of Fiddes & Sons Jacobean wax. Using the waxes is a learning process but I've found I like the finish and control these waxes give you.

On to the upholstery....

I cut 1/2" high density foam and 1 layer of quilt batting to size.

Photobucket

Then staple it all down. I don't think I even bothered to staple the foam. I just stapled the batting over the foam to keep it in place.

Photobucket

Then staple the fabric down. This is the part that makes me sweat....literally. I usually staple in the middle of each side, pulling tight as I go. All that fabric pulling is a strength work out. Then staple all in between.
Photobucket

The corners can be tricky. I usually start with a staple in the corner, then start stapling to either side of that staple and work out toward the sides (does that even make sense?)

Photobucket

Stapling can drive one crazy but I was just thankful I didn't have to contort my body like I did for the french chairs. Now that was major work.

Next on to the finishing touch...the piping. Now, I was prepared to make my own piping like I did for my daughter's headboard. However, the fabric I bought was a bit thick. I don't know if you can tell from the pictures, but the weave and hand reminds me of an antique grainsack. It has a beautiful texture. I tried to make piping and it just wouldn't go through the machine. I couldn't even fit the fabric wrapped piping under the presser foot. What to do?? I cut strips of 1.25" fabric, folded it in thirds, and sewed down the middle.....

Photobucket

Then hot glued the trim strip to the edge. Not quite double welting but with the thick fabric it was the best I could think of using materials I had at home and without using that gimp stuff. Not that I'm against that...I used it on my french chairs but I didn't want to use it for this.

If I get brave I might do a stencil on the top....maybe a monogram or a simple graphic of some sort...I feel like it's begging me to do something to the fabric but I'm so nervous to touch it! What do you think? Will I ruin it?

Now....where to put my little bench??? It keeps moving to different places in the house. I just can't decide

Photobucket

Photobucket

Showing off at:


Furniture Feature Fridays

UndertheTableandDreaming


Monday, May 2, 2011

Burlap Pillows

I finally got around to making these burlap pillows for my french chairs.

Photobucket

They were fairly easy envelope-closure pillows with a 1" flange.

1) Sew right sides together
I usually sew my pillows 1-1.5 inches smaller than my pillow. I like the filler pillow to fit snugly inside and not have a flabby, flappy cover. These are 14x20 lumbar pillows so the rectangle I made was 13.5"x19.5". Keeping in mind that sewing the 1" flange will make the pillow even smaller.

2) Turn the pillow right side out

3) Iron the pillow edges flat

4) Sew a stich 1" from the edge all the way around.

Hopefully that wasn't so confusing?! I wish I had taken more pictures of my steps...

I used a stencil, flat stencil sponge brushes, and some antique brown craft paint to make the design on each pillow.

Photobucket

The pillows really complete the look of the chairs

Photobucket

For those learning to sew, I bet if you do a YouTube search on "how to sew envelope closure pillows" you will find some good video guides? I can't tell you how much sewing I've learned from YouTube!

Tuesday, March 15, 2011

My Little Girl's Big Girl Bed

I'm on a roll lately! No, I have not found miraculous extra hours in my days, these projects have all been sitting in various stages of progress for months and I've just recently put the finishing touches on them. Which means lots of posts for you guys!

I found this headboard at a local thrift store (LAST SUMMER?!) and immediately fell in love with the shape. I wasn't so much in love with the cheapy, thin, green and white micro-check fabric. By the way, Little One was just barely over a year old and we weren't moving her into a big girl bed anytime soon but I knew I had to get this or I would regret it. It sat in the garage for a while waiting for it's destiny! And here we are on the verge of her 2nd birthday and I am so glad I was the "crazy one" who bought her big girl bed a year in advance. When you like something, you like it, am I right?


Compared to those chairs, the staples on this one were sooo easy. The foam underneath was in great shape so I just put a layer of quilt batting over the foam and put this nice new romantic girly fabric on it.

Ralph Lauren Saratoga Toile....yummy
Calico Corners is having a 20% off all fabric sale until the 26th....just so you know....

There was quite the drama with this fabric. Ordered it in Sept. didn't open the package till January after I got the bed frame painted and glazed. Upon opening, realized there were blue pen marks all over my 3 yards of fabric! Had to reorder only to learn the fabric was on backorder for a month. A lesson in patience I tell you! But it was worth the wait because I really do love the choice.


Why, yes. Yes that IS double welt cording I made and glued on m'self!

I am convinced Centsational Girl and I live parallel lives because on more than one occasion I have come to an impasse or question on some project and I need only wait one or two days and her next post has to do with the very thing I am stuck on. It's a bit freaky....

In this case, her post on double welt cording was so timely as I had visited a sewing store the previous week looking for a special sewing foot to make double welting and was so disappointed to learn that there was no such thing? Thanks to CG I was able to move forward.


Will be showing off the whole big girl room makeover soon....I am loving the room so much I may just start hanging out in there instead of my room!

Party Time!
(again)

Furniture Feature Fridays

Transformation Thursday
Frugal Friday at


UndertheTableandDreaming